

North And South Chapters Seven and Eight · 5:55pm Feb 4th, 2023
Hey all, I forgot to do a blog post last week! I apologize.
Let's begin with session seven then, shall we?

We begin with Moondancer's Army mustering. I'll name this army more topically when they fully muster and begin doing combat things, but for now, they're simply the Army of the Ohio. With two infantry divisions, a cavalry division, and an artillery battery, this army should be quite competent and able to fend off decently sized confederate armies. I haven't decided yet whether I want her to move east or west, but I've been thinking on it regardless.

We also begin purchasing a small run of Sharps Carbines for my cavalry. This way I can eventually begin replacing their rifles with Sharps Rifles, which are hands down THE best rifles for cavalry in the game - though Spencer Rifles are a close second.

Another purchase I make is a medium sized run of 3" Ordnance rifles. We'll get these slower than the Wiards, but they're just as good, and this way I can start greatly expanding my artillery roster and guns train size.

I also went ahead and researched Cast Artillery. The Napoleons I don't need to manufacture more of, but having access to the James Rifle isn't bad. If I start hurting for artillery, I can begin manufacturing some of those as a good enough for it's cost alternative to 3" guns and Wiard Rifles, but really it's just been done so that I don't keep getting notified that I can research the project every time I hit 1 million in subsidies.

And then finally for Session 7, we receive the July Intel spread.
More rebel infantry, more rebel fleets, and more rebel diplomacy; I'm going to have to start countering that soon, they might be trying to sway the French into joining early, which would be... problematic at the present.
Now then, onto session 8, which was the Second Battle of Staunton.

The CSA really doesn't want Lightning Charm over here it seems. I'm not exactly sure why they're not using their big stinkin' 23,000 man force across the river there (though they're probably just holding Twilight and Trixie in check with those and re-grouping their main army) but I believe in gifts.

I decided to deploy a bit differently here rather than just sitting on the defense point and letting the CSA come to me. Instead, I split my army into two wings, and forced a confrontation in the south whilst the eastern flank was still marching towards me.

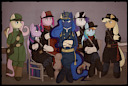
Pictured, Starry and Night Light (yes, Twilight's Dad. No, she's not aware of his presence yet, in-universe.) bullying D.R. Jones' Brigade.

Spring Rain meanwhile, holds off the other Brigade (John Hood's, I think? I might be wrong there) and an artillery battery. She takes some casualties, but does a lot better than Cherry Berry, which I'm quite happy with.

After seeing off the fight in the south, I just moved my artillery to face the east flank, and the rebel morale crumbled pretty quickly after that. If you go back and look at the initial deployment screenshot, you might notice the red heart in the bottom right corner of the two CSA armies. That means their morale is low from previous combat, and they need time to rest.
Again, I'm not sure why the CSA forced this fight, but I believe in gifts.

And then to end off the day's fighting, the results of Second Staunton. Not a bad day's work, if I do say so myself.
Really notable here is the casualty disparities. The CSA took ~200 dead, and a further ~250 captured, leading to 450 unrecoverable injuries. We only took 77 dead and ~80 deserters, meaning that we only really took ~150 casualties that we can't recover. Yeah, the CSA did not come out very good from this engagement.
See y'all next time!