

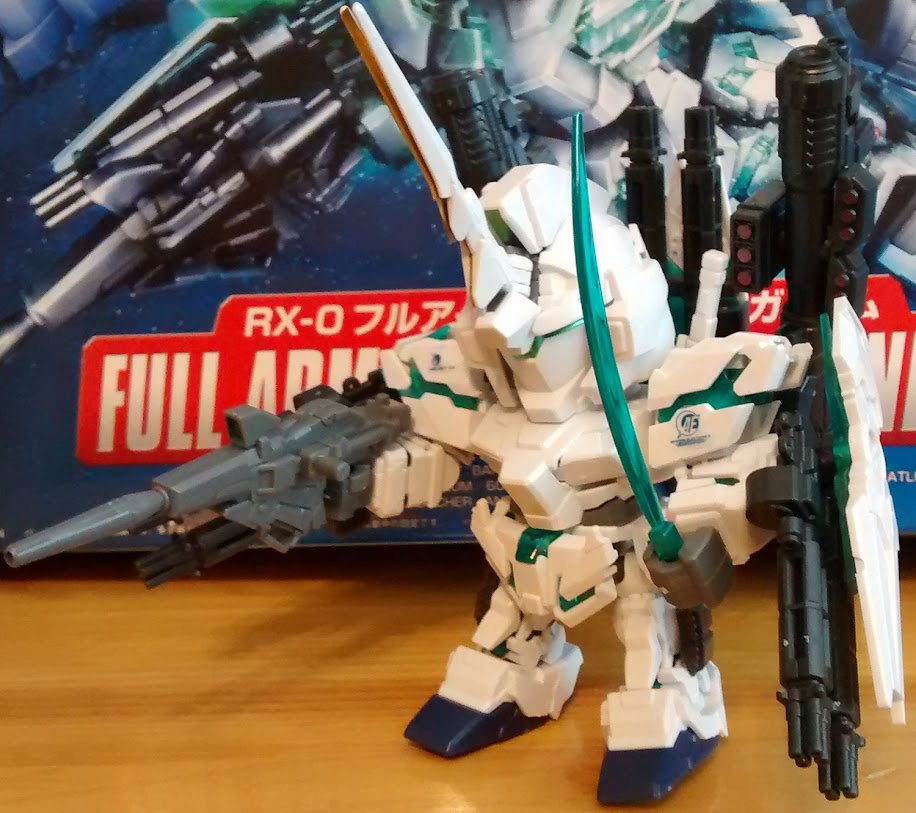
Gunpla Review: 1/144 RG Exia · 1:14am Jan 4th, 2016

This is my first Real Grade kit, and I cannot make it clear enough that I cannot recommend this for beginners due to the complexity and length of the build. But if you have the patience and the dexterity to work with extremely small parts, and easy-to-lose transparent plastic pieces, go for it: the finished product looks _fantastic_!

RG means superior articulation due to the complete inner frame, greater detail, and gimmicks, mostly from the Master Grade kits that precede them -- but without the weaker ankles that MG kits seem to be prone to. Greater detail also means smaller pieces in many cases. Fortunately, the parts for the inner frame come partially assembled, so you don't have to fit each piece together the way you have to when you're working with an HG's polycaps.


Unfortunately, if you misread an instruction or handle a piece just a little too roughly, or you are unfortunate to have received a kit with defective parts as I was, you can end up with some broken pieces. In my case, the sliding minor arm on the right arm had a tab that is supposed to click into a groove in the arm. That tab broke. Fortunately I can still use the arm. I just occasionally have to slide the minor arm back into the cuff when I unbend the arm sometimes.
I should also mention that some of the gate placement makes cutting parts of their runners something of an adventure. I advise cutting away the easy sprues first, and then the troublesome ones if you can get at them. If it would improve accessibility, you can cut further from the piece and then cut off the extra sprue.
RG articulated hands have a moving index finger, thumb, and three joined fingers. Each has a ball joint that connects directly into the hand and a knuckle joint. On the right hand, the joints for the three fingers broke off, rendering that hand useless. Fortunately, the right holding hand is better for use with the GN Sword I anyway, and that weapon is exclusive to the right arm.
The stickers for under the condenser domes can also be a challenge to place, since they can tear easily and once you place them down they cannot be moved, the way I used to adjust the position for HG stickers. I ended up ripping one, but I did my best anyway. Unlike HG kits from _00_, the domes are clear green. The condensers look awesome.

The biggest challenge, which is probably unique to the RG Exia, is the powerlines. Except for the head, there are silver stickers that you place first. Then there's a PET transparent slip that you place over top of the sticker. There are small tabs on the top and bottom of the arm and leg placements, so you can tell when they're in, although a couple of mine did fall out until I put the armour pieces on around them. If you lose your hold on these covers they can be extremely hard to find. I recommend having a light nearby so you can use that if they fall on the floor. The head powerline pieces do not have corresponding stickers, however they are flat, and they need to be placed into a curved surface. My advice, based on a Hobbylink TV video, is to pin them down using the side pieces that go on over them. You can pin one side of the powerline piece at a time, then use a thin pointed object to tuck the other end under the side piece, and then click it solidly into place.


I might also recommend placing the other many small decals during assembly instead of after, since they are small and the bulk of the complete gunpla can get in the way quite easily. I only started placing the decals after construction was complete. Because I cannot manipulate the smaller ones well, I skipped many of them. I also skipped the powerline straps that connect the shoulder pads to the upper arms, because I heard they can hinder articulation slightly.

As for as customization not included in the instructions go, I used my metallic green gundam marker on the circular pieces on the outside of both legs (except for the hip covers), as well as the large area in the middle of the shoulder pads to give the Exia more condensers, sort of like the Try Burning or Kamiki Burning. I also coloured the vents on the tops of the knee armour with my gold gundam marker. I did not use either camera sticker because I like the clear green piece. I used the eye sticker with the eye holes for a similar effect.


Despite the problems I encountered, I found myself entering a rhythm, and enjoyed the experience. It took me two days to complete the build, and a morning to do the decals. Of course, if I had other things on my schedule it would have taken me many more days. In all, I am prepared to call this a 16 hour build. And of course, I could not help comparing it to my HG 00 Gundam, to which I had given the Seven Sword/G weapons. I call it 'Tenken,' for 'Ten Swords' or even 'Heaven Swords.' Add the 0 Raiser, and I call it 'Ascent.'

With the articulation and simpler aesthetic (no complicated backpack or overwhelming arsenal of weapons), I believe this kit is worth it. I can recommend this kit to those who want a great challenge, and have the patience and perseverance to pull it off despite all the tiny pieces.
Build level: High-Intermediate (Experienced)
Build Time: ~16 hours.
Tools used: Baby nippers, file, reverse tweezers, angled tweezers, green gundam marker, gold gundam marker.
Recommended for: Experienced builders (meaning that beginners can tackle other kits first, then come to this one).